InfluxDB 2.x: CSV: Unterschied zwischen den Versionen
Aus Wiki-WebPerfect
Admin (Diskussion | Beiträge) |
Admin (Diskussion | Beiträge) |
||
| (6 dazwischenliegende Versionen des gleichen Benutzers werden nicht angezeigt) | |||
| Zeile 1: | Zeile 1: | ||
| + | == Export & Import CSV-file directly with Influx-GUI (InfluxDB > 2.0.5) == | ||
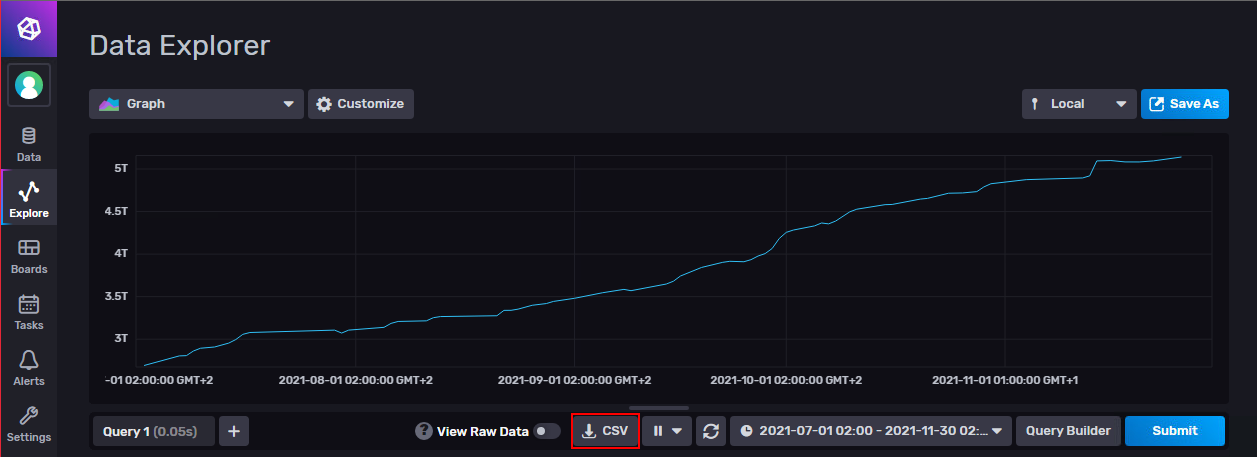
| + | *Write a query and export the CSV: | ||
| + | [[Datei:01-influxdb csv-gui.png]] | ||
| + | |||
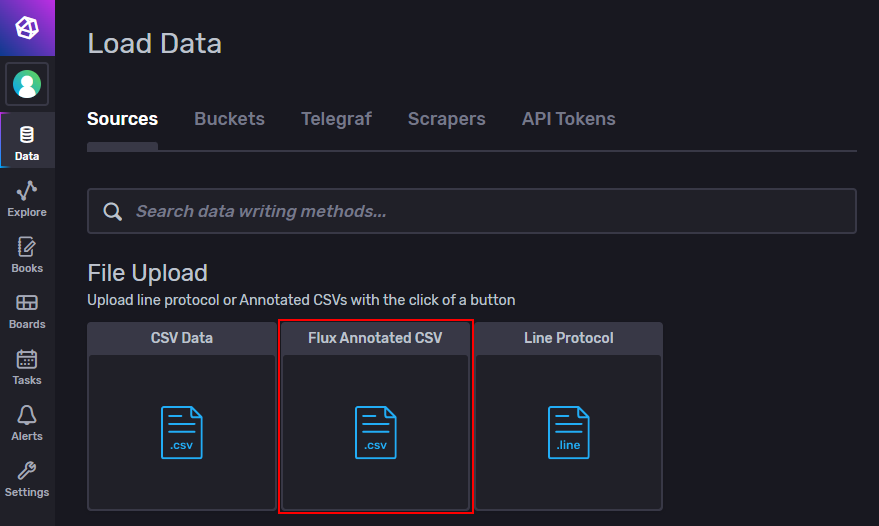
| + | *Import the generated CSV: | ||
| + | [[Datei:02-influxdb csv-gui.png]] | ||
| + | |||
| + | |||
| + | |||
== Import CSV-file directly with Influx-CLI (InfluxDB 2.x) == | == Import CSV-file directly with Influx-CLI (InfluxDB 2.x) == | ||
influx write -b <YOUR_BUCKET> -f <YOUR_CSV>.csv -o <YOUR_ORG> -t <YOUR_TOKEN> | influx write -b <YOUR_BUCKET> -f <YOUR_CSV>.csv -o <YOUR_ORG> -t <YOUR_TOKEN> | ||
| Zeile 23: | Zeile 32: | ||
| − | '''Use the exported data (Explorer Query):''' | + | '''Use the exported data (Explorer Query):''' <br> |
| + | You only have to use '''import "csv"''' and create a '''variable with the CSV-data''' in it and load the csv with '''csv.from(csv: csvData)'''. | ||
| + | |||
<pre> | <pre> | ||
import "csv" //import the csv library | import "csv" //import the csv library | ||
Aktuelle Version vom 25. November 2021, 09:51 Uhr
Export & Import CSV-file directly with Influx-GUI (InfluxDB > 2.0.5)
- Write a query and export the CSV:
- Import the generated CSV:
Import CSV-file directly with Influx-CLI (InfluxDB 2.x)
influx write -b <YOUR_BUCKET> -f <YOUR_CSV>.csv -o <YOUR_ORG> -t <YOUR_TOKEN>
Work with a CSV in InfluxDB 2.x Explorer (from am exported query)
You can export queried data directly from InfluxDB 2.x Explorer with the button near the "Submit" button.
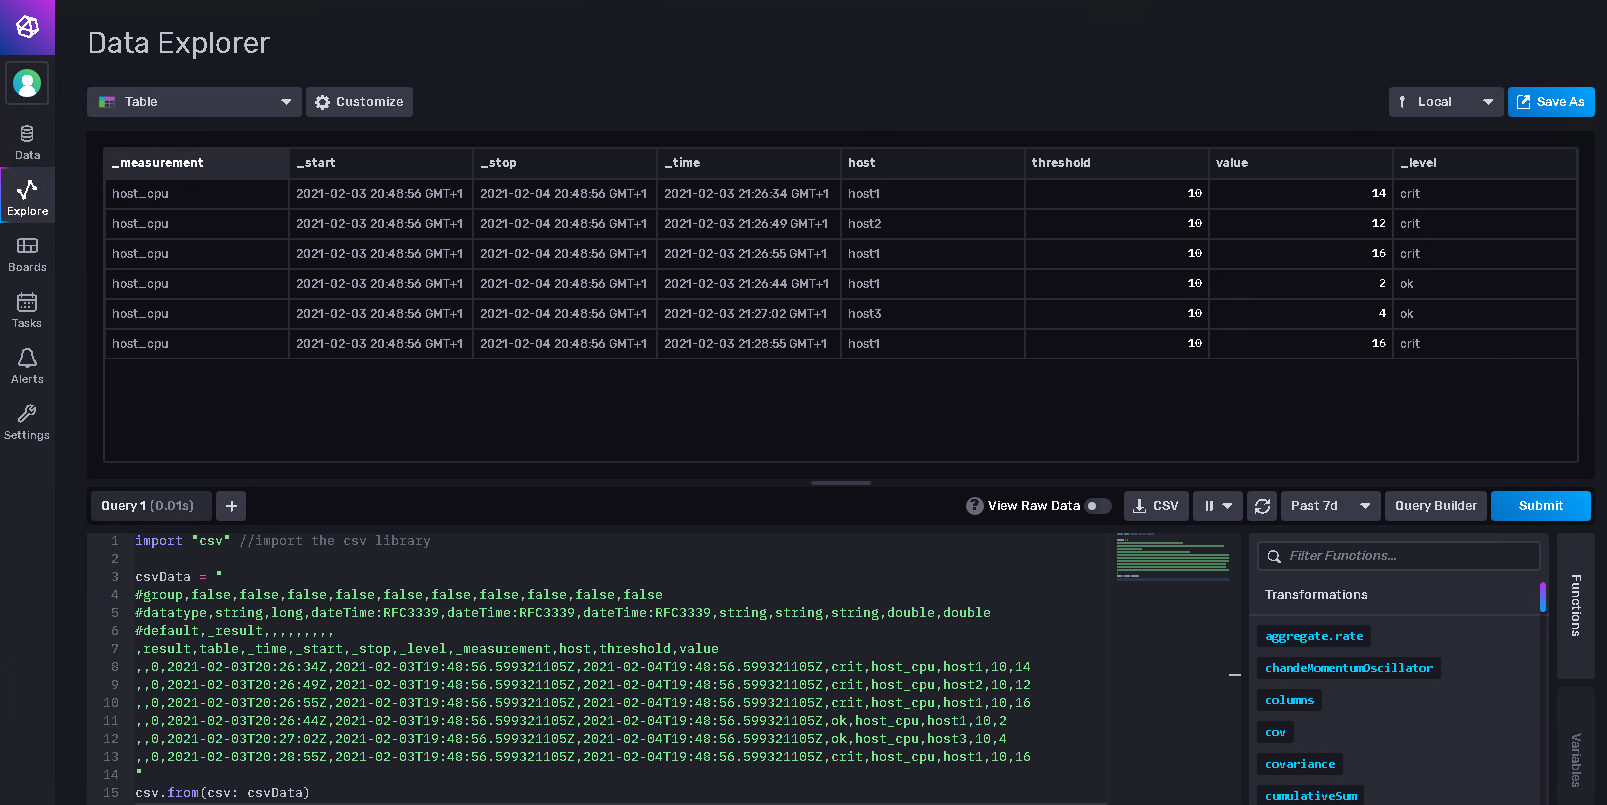
In this example, I show you how to easy work with exported CSV data without import it to your buckets
Exported data from InfluxDB 2.x Explorer:
#group,false,false,false,false,false,false,false,false,false,false
#datatype,string,long,dateTime:RFC3339,dateTime:RFC3339,dateTime:RFC3339,string,string,string,double,double
#default,_result,,,,,,,,,
,result,table,_time,_start,_stop,_level,_measurement,host,threshold,value
,,0,2021-02-03T20:26:34Z,2021-02-03T19:48:56.599321105Z,2021-02-04T19:48:56.599321105Z,crit,host_cpu,host1,10,14
,,0,2021-02-03T20:26:49Z,2021-02-03T19:48:56.599321105Z,2021-02-04T19:48:56.599321105Z,crit,host_cpu,host2,10,12
,,0,2021-02-03T20:26:55Z,2021-02-03T19:48:56.599321105Z,2021-02-04T19:48:56.599321105Z,crit,host_cpu,host1,10,16
,,0,2021-02-03T20:26:44Z,2021-02-03T19:48:56.599321105Z,2021-02-04T19:48:56.599321105Z,ok,host_cpu,host1,10,2
,,0,2021-02-03T20:27:02Z,2021-02-03T19:48:56.599321105Z,2021-02-04T19:48:56.599321105Z,ok,host_cpu,host3,10,4
,,0,2021-02-03T20:28:55Z,2021-02-03T19:48:56.599321105Z,2021-02-04T19:48:56.599321105Z,crit,host_cpu,host1,10,16
Use the exported data (Explorer Query):
You only have to use import "csv" and create a variable with the CSV-data in it and load the csv with csv.from(csv: csvData).
import "csv" //import the csv library

csvData = "
#group,false,false,false,false,false,false,false,false,false,false
#datatype,string,long,dateTime:RFC3339,dateTime:RFC3339,dateTime:RFC3339,string,string,string,double,double
#default,_result,,,,,,,,,
,result,table,_time,_start,_stop,_level,_measurement,host,threshold,value
,,0,2021-02-03T20:26:34Z,2021-02-03T19:48:56.599321105Z,2021-02-04T19:48:56.599321105Z,crit,host_cpu,host1,10,14
,,0,2021-02-03T20:26:49Z,2021-02-03T19:48:56.599321105Z,2021-02-04T19:48:56.599321105Z,crit,host_cpu,host2,10,12
,,0,2021-02-03T20:26:55Z,2021-02-03T19:48:56.599321105Z,2021-02-04T19:48:56.599321105Z,crit,host_cpu,host1,10,16
,,0,2021-02-03T20:26:44Z,2021-02-03T19:48:56.599321105Z,2021-02-04T19:48:56.599321105Z,ok,host_cpu,host1,10,2
,,0,2021-02-03T20:27:02Z,2021-02-03T19:48:56.599321105Z,2021-02-04T19:48:56.599321105Z,ok,host_cpu,host3,10,4
,,0,2021-02-03T20:28:55Z,2021-02-03T19:48:56.599321105Z,2021-02-04T19:48:56.599321105Z,crit,host_cpu,host1,10,16
"
csv.from(csv: csvData)
//here you can use every Flux filters, functions & calculation you want


