Custom Discovery PowerShell-Script: Unterschied zwischen den Versionen
Aus Wiki-WebPerfect
Admin (Diskussion | Beiträge) |
Admin (Diskussion | Beiträge) K |
||
| Zeile 29: | Zeile 29: | ||
| − | + | -> Done, have fun! :) | |
[[Kategorie:Zabbix]] | [[Kategorie:Zabbix]] | ||
Version vom 3. Dezember 2019, 10:16 Uhr
Inhaltsverzeichnis
[Verbergen]Example Monitor Windows Storage Mountpoints
PowerShell-Script on the target System
Write a PowerShell-Script "Get-CSVsForDiscovery.ps1" with the following content and save this in "C:\Program Files\Zabbix Agent":
$json = (Get-ChildItem "C:\ClusterStorage\" | Select @{Name='{#CSVNAME}';Expression={$_.Name}} | ConvertTo-Json)
$final = ('{"data":'+$json+'}')
$final
Zabbix Agent Configuration (zabbix_agentd.conf)
Add the following line:
UserParameter=custom.discovery.csvnames,powershell -File "C:\Program Files\Zabbix Agent\Get-CSVsForDiscovery.ps1"
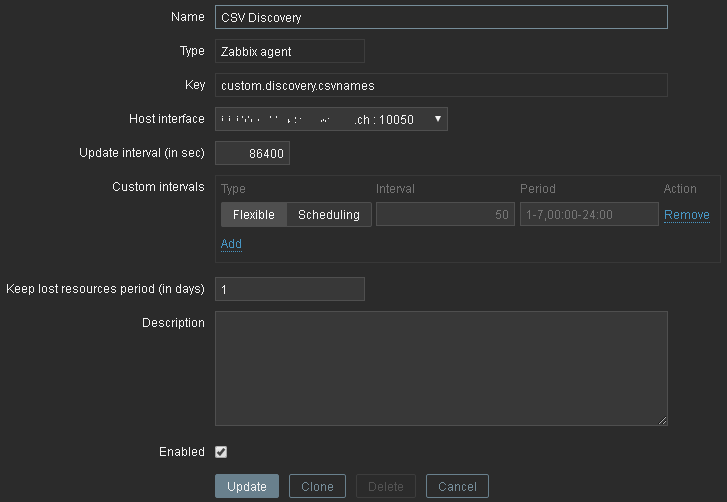
Zabbix Discovery
Create a new Zabbix Discovery:

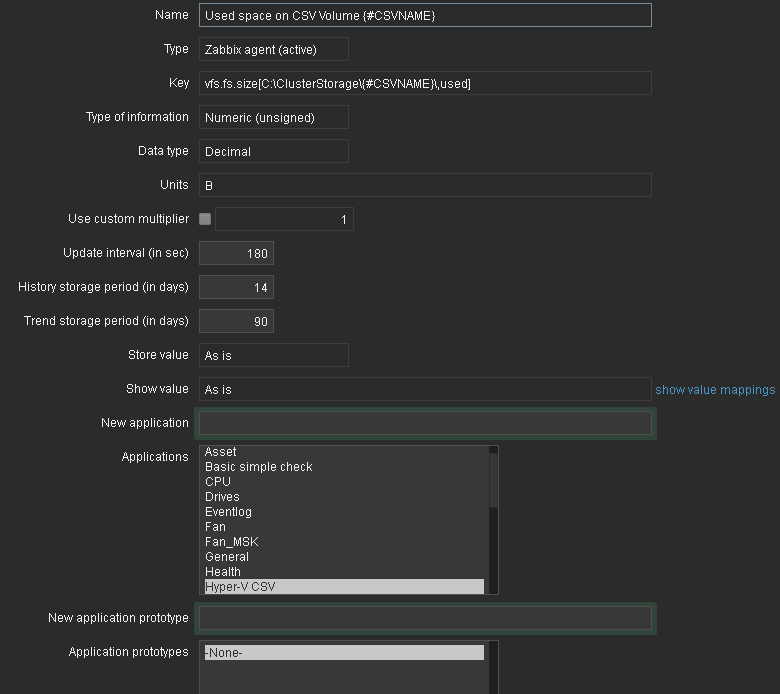
Zabbix Items Prototypes
Create new Zabbiy Item Prototypes:

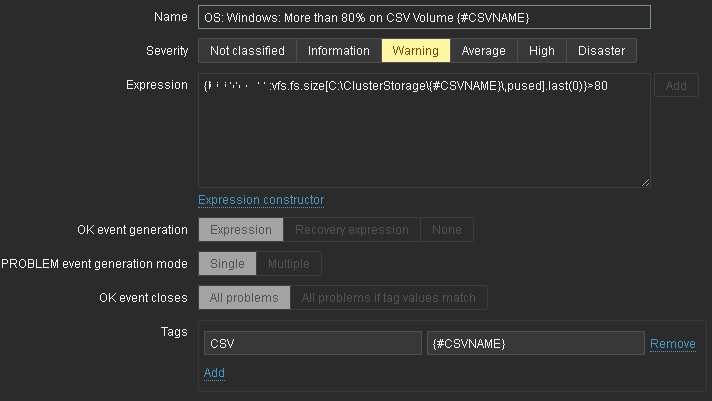
Zabbix Triggers Prototypes
Create new Zabbix Trigger Prototypes:

-> Done, have fun! :)